Follow these steps once. After this, just open the app and pair your phone.
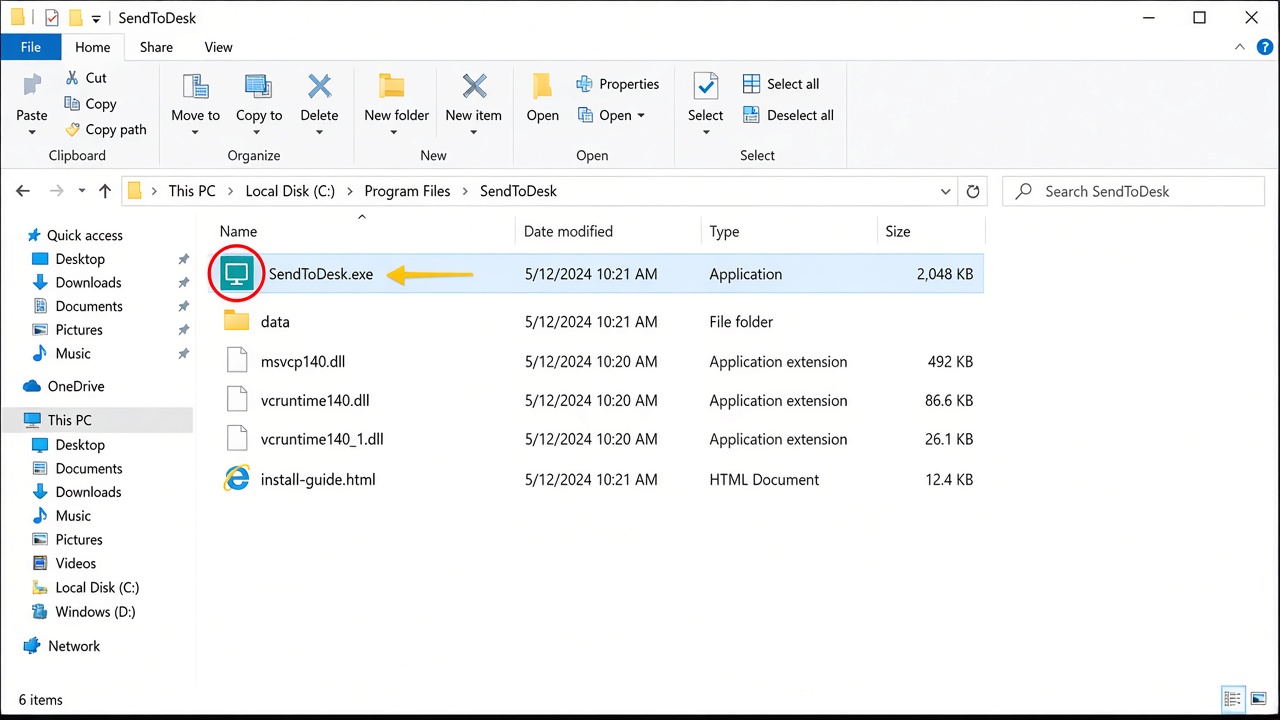
1 Open the SendToDesk .exe
If you downloaded a zip, extract it first, then open the folder. Double-click the SendToDesk .exe. That one file is the installer. It works on its own.
Click the SendToDesk .exe, then follow the setup windows.
After setup, open SendToDesk from the Start menu or the desktop shortcut.
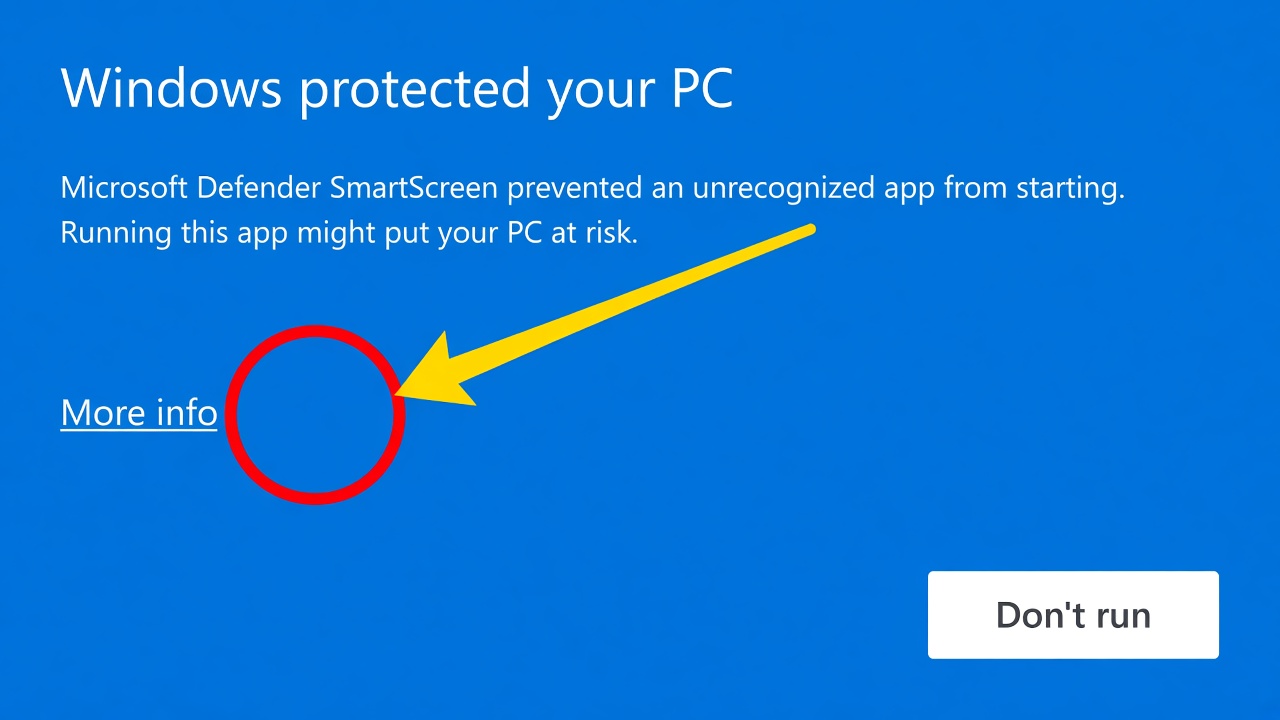
2 If you see “Windows protected your PC”
This is normal the first time. The window only shows Don’t run. You must click the small link first.
Click More info on the left. Do not click Don’t run.
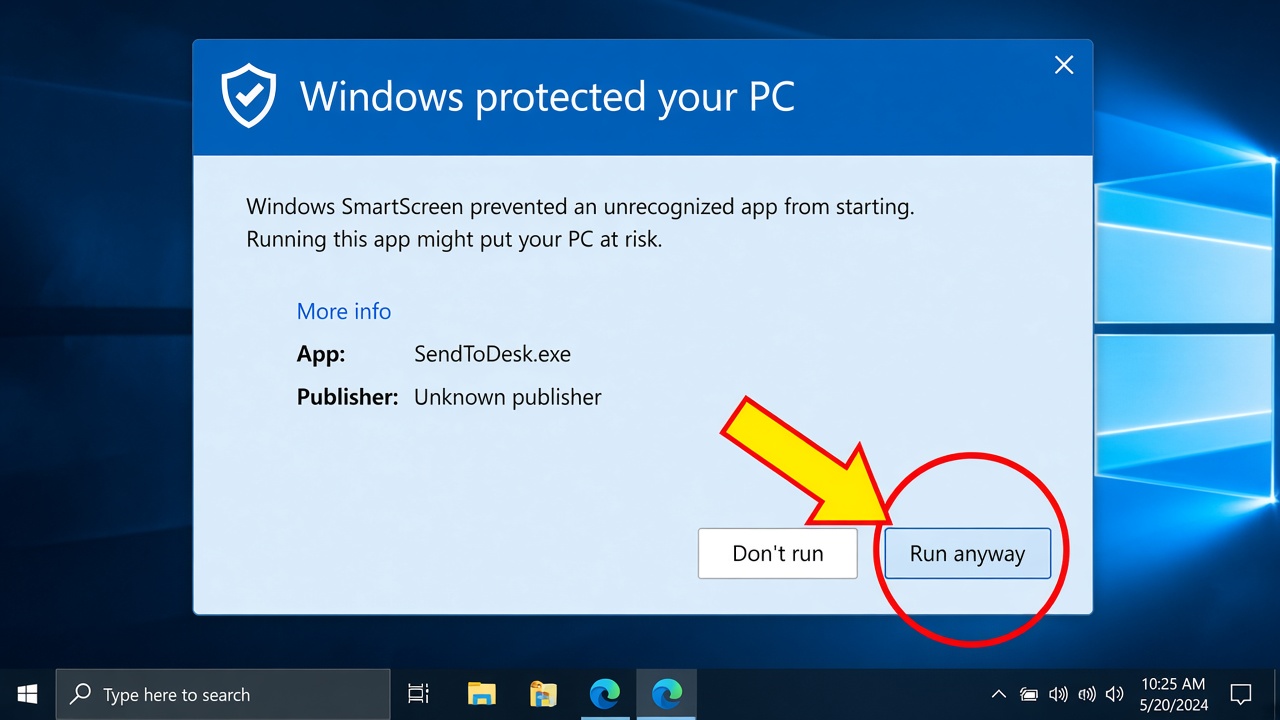
A new button appears. Click Run anyway.
Click Run anyway to open SendToDesk.
This warning appears because the Windows file is new. Use it only if you downloaded from the official SendToDesk website.
3 Allow the firewall
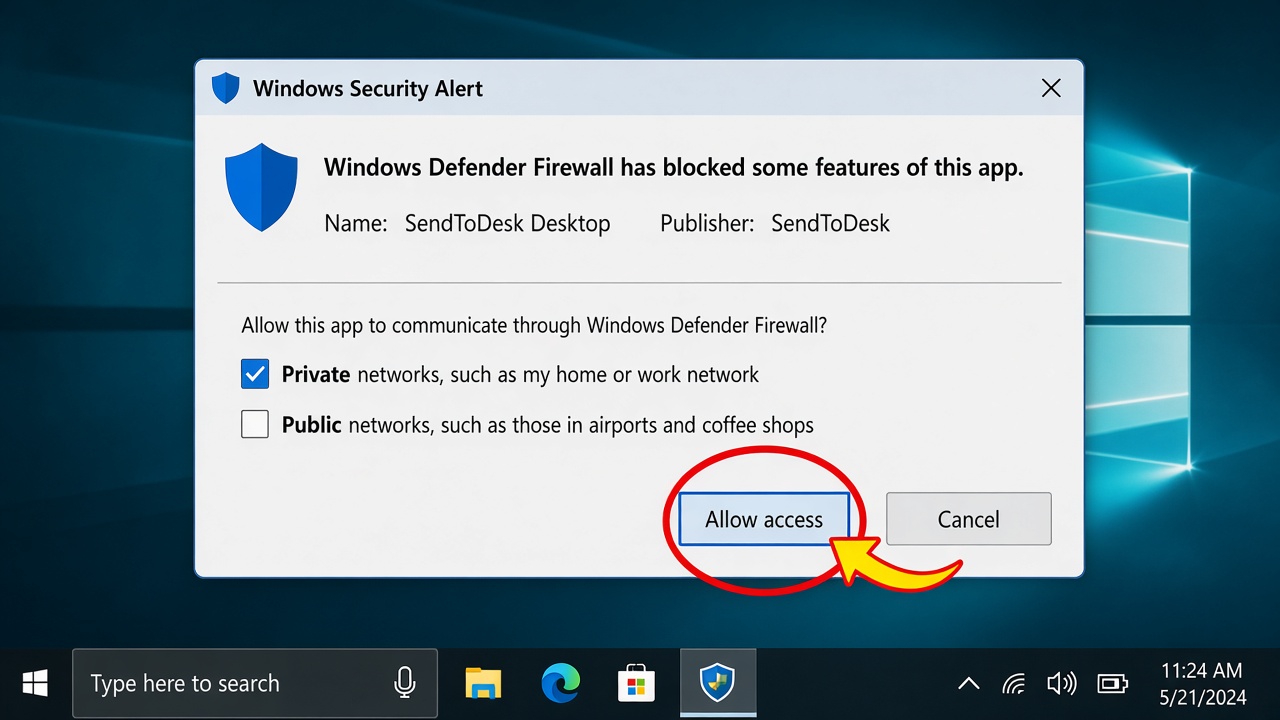
The first time the app opens, Windows may ask about the firewall. Your phone cannot find the PC if you click Cancel.
Tick Private networks, then click Allow access.
Leave Public networks unticked. If you already clicked Cancel, see the tip below.
4 Pair your phone
Keep SendToDesk Desktop open. Put the phone and PC on the same Wi‑Fi. In the Android app, connect with Nearby, QR, or the 6-digit code.
If you clicked Cancel by mistake
Open Windows Security → Firewall & network protection → Allow an app through firewall → find SendToDesk → tick Private → OK. Then open the app again.
 SendToDesk